Installation and filter FAQs

Warranty

Warranty

Zip HydroTap is backed by a 2 year Limited warranty.

Request a Service

Request a Service

Zip water appliance technicians are qualified experts, trained to professionally service and maintain all Zip Water systems.

Request service

Contact Us

Contact Us

Do you have a question that is not answered here? Complete the form and one of our experienced team will get back to you.

Contact us

The default setting for the dispense time is 15 seconds but this can be adjusted to any time in between 5 and 15 seconds in increments of one second.

Step 1: Select [MENU] to bring up the main menu.

Step 2: Select [Setting].

Step 3: Select [Dispense Time].

Step 4: Use the Up and Down arrow keys to select the time required.

Step 5: Select [Home] to return to the main menu. Your selection has now been made.

It is a good idea to recalibrate the sensor once you have selected any of the Lux sensor options from the sleep mode menu. For best results calibrate the sensor while the area is well lit.

Step 1: Press the [MENU] button to bring up the main menu.

Step 2: Press the [Install] button.

Step 3: Press the [Lux Sensor Calibration] button.

Step 4: Check the lights on the tap head are flashing to confirm the calibration.

Step 5: Select [Home]. The sensor has now been calibrated.

Energy modes are used to help the HydroTap G4 save energy. There are two options available: “Sleep” mode and “On/Off” mode.
• In “Sleep” mode the unit will power down after a period of inactivity. You will know the unit is in this mode when the home screen status window says “Sleep Mode”.
• In “On/Off” mode you can set the unit to turn on or off at a particular time.

How to activate “Sleep” modeStep 1: Press the [MENU] button to bring up the main menu.

Step 2: Press the [Setting] button.

Step 3: Press the [Energy Modes] button then press the [Sleep Modes] button.

Step 4: In the “Sleep Modes” screen you will see seven “Sleep Mode” options listed. Use the Up and Down arrows to select the mode you wish to set.


Option1: (2 Hours/68˚C) Boiling water temperature will gradually drop to 68˚C after 2 hours of inactivity but the chiller will remain ON.
Option 2: (2 Hours/OFF) Boiling and chilled water temperature will gradually drop to room temperature after 2 hours of inactivity. The boiler and chiller will remain OFF*.
Option 3: (Lux Sensor/68˚C) Boiling water temperature will gradually drop to 68˚ when the unit senses it has become dark in the room. For more on this option, refer to the Lux Sensor calibration section.
Option 4: (Lux Sensor/OFF) Boiling water temperature will drop gradually to room temperature when the unit senses it has become dark in the room and the boiler will remain OFF*.
Option 5: (Lux or 2Hr/68˚C) When the room becomes dark, Option 3 will be activated. At all other times Option 1 will be automatically activated. For more on this option, refer to the Lux Sensor calibration section.
Option 6: (Lux or 2Hr/OFF) Boiling water temperature will gradually drop to room temperature and the boiler will remain OFF*.
Option 7: (Disable) The “Sleep mode” function will be disabled. If this option is selected and no on/off times are set in the “On/Off” mode, the boiling circuit will be switched ON continuously and the HydroTap will operate 24 hours/7 days.

*Note: If the unit is in OFF mode you can “wake” it up simply by dispensing water. The unit will automatically return to the selected sleep mode after 2 hours of inactivity. You will need to allow enough time for the water to come back to your selected temperature after you “wake” it up.

Lux Sensor calibration
It is a good idea to recalibrate the Lux Sensor once you have selected any of the Lux sensor options from the sleep mode menu. Click here for instructions.


How to activate “On/Off” mode

If you wish to use the “On/Off” mode you must also set your current date and timeClick here for instructions on how to set the date and time.

Step 1: Press the [MENU] button to bring up the main menu.

Step 2: Press the [Setting] button.

• If you have set a password via the security button, you will be prompted to enter it now.
• If you have not set a password via the security button, you will proceed straight to the Settings menu.

Step 3: Press the [Energy Modes] button.


Step 4: To select the on/off mode that suits you best:

Select “Individual set” if you wish to set a specific time for each day. Note: only one On/Off period is allowed for each day.
Or
Select “Group Set 1” if you wish to set the same time for all 7 days of the week.
Or
Select “Group Set 2” if you wish to set the same time for all 5 work days (Monday to Friday) and other times for the weekend (Saturday and Sunday).

Step 5: Use the [On/Off Modes] button to set the on and off times for each day or group of days.

Note: If the unit is in OFF mode you can “wake” it up simply by dispensing water. The unit will automatically return to the selected energy mode after 30 minutes of inactivity.

Step 1: Select [MENU] to bring up the main menu.


Step 2: Select [Setting] 

Step 3: Select [Date/Time]

Step 4: Select either 12-hour mode or 24-hour mode. The selected mode will be displayed in a dark grey colour with a tick box to the right.

Step 5: Select [NEXT] to select the current date and time.

Step 6: Press the [HOME] button to return to the main menu. Your date and time are now set.

If your sparkling water is coming out of the tap flat it might be time to change your Co2 cylinder. First, check the regulator pressure gauge located on the canister to see where the needle is pointing. If it is down towards the left in the yellow zone, adjust the knob on the top of the bottle. If the needle doesn’t go back to the green zone then the cylinder will need to be changed.

Zip part number 91295 (2 x canisters of 1000 grams of Co2). Note – Safety glasses gloves or a towel and care should be used when fitting or removing the regulator from the bottle.

If you are unsure about changing a Co2 cylinder, a qualified Zip service technician would be happy to assist. Call 1800 460 222 to schedule an appointment.

Step 1: First you will need to turn the Co2 cylinder regulator off. Do this by twisting the knob anti-clockwise until it screws up and away from the bottle.


Step 2: Before removing the regulator from the bottle, start the Co2 purge to
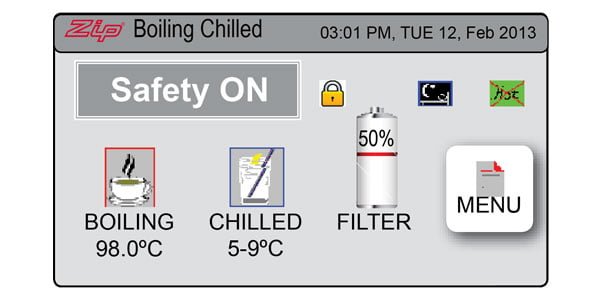
relieve any pressure in the Co2 line. On the screen menu select [Install] then [Co2 Purge], then [Start].

Step 3: Gas flow will start, then slow and stop. When gas flow has stopped, press [Stop]. You may leave the display in this mode.

Step 4: Remove the bottle from the cupboard and disconnect the regulator by unscrewing it from the bottle. The braided hose can be left attached to the regulator. If removal of the hose to regulator is required take care not to lose the plastic olive inside the braided hose.

Step 5: The regulator and hose assembly needs to be fitted to the new gas bottle. Do this by screwing the new regulator in place. Be aware some Co2 may be discharged from the cylinder as the regulator is attached and always make sure the bottle is upright.

Step 6: Slot the bottle back into place in an upright position securing it with the fixing strap.

Step 7: Turn the Co2 cylinder regulator on by twisting the knob slowly clockwise. Watch the needle on the gauge carefully and keep twisting the knob until the gauge indicates 3.0-bar, in the Green zone on the dial

Step 8: It’s important at this stage to check for gas leaks so take a soapy sponge and allow some soap suds to fall on the regulator fitting and hose. Watch carefully for any movement orincreasing bubbles in suds that would indicate a leak. If you spot a leak, twist the knob back in an anti-clockwise direction (turning regulator off) and rectify leak. Wipe off suds and repeatthe checking process. If all ok proceed to next step. If further assistance is required please call ZIP Customer Care on 1800 460 222 .

Step 9: Next you need to purge the gas lines to ensure the new CO2 cylinder will work efficiently. If your screen is not showing the Co2 purge screen, press the [MENU] button to bring up the main menu. Press the [Install] button then press [Purge CO2].

Step 10: When the next screen comes up, press the [START] buttonWater will begin to flow through the HydroTap. If a font is fitted, a bucket or bowl to catch water flow from tap may assist.

Step 11: When the water appears to have stopped flowing and only Co2 gas is escaping through the tap, wait another 10 seconds then press the [STOP] button to end the purge. Dispose of the purge water in the sink.

Step 12: Press the [] button to go back to the previous menu or press [HOME] to return to the home screen.

Step 13: It’s a good idea to dispense some sparkling water from the tap and perform a taste test. There may be a small burst of gas pressure when you perform this task but if you let the levers go then press again, the unit should work normally.

Step 14: Residential G4 HydroTap cylinders are non-refillable but can be recycled at most council recycling facility. Please do not place in council bin but dispose of thoughtfully. If a Zip technician changes your cylinders, they will remove the old cylinder and recycle it for you.

Your Zip HydroTap will notify you when the filter replacement is due. The change filter light will flash white once per minute until the filter has been replaced, and the filter percentage will show 0% on the Home screen.

Step 1: Grab an empty bucket or container to collect the water which will be flushed through the system and an old towel to mop up any spills.

Step 2: Open the filter access door on the front of the HydroTap Command Centre. You will see the filter cartridge in front of you.

Step 3: Reach to the rear right hand side of the cartridge and you’ll find a flush line (looks like a hose) which is around60cm long which will be sealed with a stop cock located in the centre of the hose. Place the free end of the flush line into the empty bucket or container. Turn the stop cock quickly on then off to relieve system pressure.

Step 4: Gently hold the filter cartridge then press the red lever at the top right of the unit and rotate the cartridge a quarter turn to the left. The unit should detach and you should be able to pull it free in a downwards motion. Some water may drip from the cartridge at this point. Be sure to keep the cartridge level to avoid spills.

Step 5: Place spent cartridge in the sink or other suitable container.

Step 6: Unpack your replacement cartridge and remove the sanitary capWrite today’s date where shown on the label. Ensure you avoid touching the O-rings or filter opening as this can cause bacterial contamination of the cartridge.

Step 7: Slightly moisten the O-rings with regular tap water and line up the front cartridge label to the left.

Step 8: Gently but firmly push the cartridge up into the filter head and turn a quarter-turn to the right – as far as it will go without forcing it. The cartridge should now be locked in position with the front label facing forward.

Step 9: Press the [MENU] button to bring up the main menu on the screen.

Step 10: Press the [Install] button and turn the stop valve ON by rotating the lever clockwise until it is in line with the hose.

Step 11: Press the [Filter Flush] button then press [Start] to begin the process. Ensure you run at least 10-litres of water through to flush the filter of excess black carbon particles.

Step 12: When the filter flush is finished, turn the stock valve OFF by rotating the lever anti-clockwise until it is perpendicular to the hose.

Step 13: Press [Stop] to end the filter flush process.

Step 14: Press the [Home] button to return to the home screen.

Note: If you are carrying out this flush after the HydroTap’s initial installation, the unit will go directly into calibration mode after the Filter Flush Mode is turned off. With any subsequent filter changes the system will automatically revert to the main menu.

Step 15: Dispose of used cartridge and packaging thoughtfully.

How to turn the G4 HydroTap off and on, before and after a holiday

To Turn OFF

Step 1: Turn the water off at the supply to the Command Centre.

Step 2: Depress each lever on the HydroTap three or four times until the water stops. This will empty the tanks.

Step 3 [Commercial model]: Turn off power supply at the power point.

Step 3 [Residential model]: Turn off power supply using the power switch on the back right hand side of the Command Centre or the power point .

To Turn ON – HydroTap Boiling|ChilledHave a bucket or container handy plus a towel to mop up any spills.

Step 1: Turn on water supply at supply point. Turn on power supply at power point. Note: any programmed times will be retained via the battery backup and will not need to be re-set.

Step 2: On the LCD screen, select [MENU] then [Install] and then [Filter Flush].

Step 3: Open the filter flush stop valve and ensure the end of the hose is in a bucket or sink.

Step 4: Then select [Filter Flush START]. This will start the flow of water. Flush for 30 seconds to remove any water sitting in the filter cartridge.

Step 5: When the Filter Flush is finished, turn the stop valve to OFF by rotating the lever anti-clockwise until it is 90° to the hose. Replace the hose into the filter compartment.

Step 6: Press [Filter Flush – STOP] to end the filter flush process. Use the [Home] key to exit the Flush Menu. Wait for lights on tap to stop flashing and the unit will be ready for use.

To Turn ON – HydroTap Boiling|Chilled|Sparkling

Have a bucket or container handy plus a towel to mop up any spills.

Step 1: Turn on water supply at supply point. Turn on power supply at power point. Note: any programmed times will be retained via the battery backup and will not need to be re-set.

Step 2: On the LCD screen, press [MENU] then [Install] then [Filter Flush].

Step 3: Open the filter flush stop-valve and ensure the end of the hose is in a bucket or sink.

Step 4: Then select [Filter Flush START]. This will start the flow of water though the flush hose. Flush for 30 secondsto remove any water sitting in the filter cartridge.

Step 5: When the Filter Flush is finished, turn the stop-value to OFF by rotating the lever anti-clockwise until it is 90° to the hose. Return the hose into the filter compartment.

Step 6: Press [Filter Flush STOP] to end the filter flush process. Use the arrow key to exit the Flush Menu.

Step 7: Select [Co2 Purge].

Step 8: Select [Co2 Purge ON]. This will push Co2 and water through the HydroTap’s system.

Step 9: Let the Co2 flow until the water has finished and only Co2 is being dispensed from the tap. Leave the Co2 flowing for 5-10 seconds longer then press [Co2 Purge OFF] on the LCD screen.

Step 10: Exit by selecting the home screen.

Learn how to install a HydroTap vent tray for commercial systems in the short video below.

How to install the Zip Celsius All in One HydroTap.

The Zip HydroTap Arc and Cube are not only stylishly designed but they’re also easy to use. Learn how to use your new HydroTap by watching the short video below.

The Zip HydroTap Classic is not only stylishly designed but it’s also easy to use. Learn how to use your new HydroTap by watching the short video below.

Learn how to install the Arc & Cube faucet by watching the short video below.

Learn how to install the Classic faucet by watching the short video below.

Learn how to install the HydroTap BCS command centre by watching the short video below.

Learn how to install the HydroTap CS command centre by watching the short video below.

Learn how to use the HydroTap boiling and chilled residential command centre.

Learn how to use the HydroTap boiling and chilled commercial command centre.

Learn how to use the HydroTap boiling, chilled & sparkling commercial command centre.

All plumbing and electrical work must be completed by trained and suitably qualified Tradespeople and must comply with all relevant local, state and federal codes.
Limitation Of Liability For Special, Incidental, Consequential Or Punitive Damages:
Zip Water specifically disclaims any and all liability, whether directly or by way of indemnity, for special, incidental, consequential, punitive or exemplary loss or damage, including as a result of any faulty operation due to unqualified persons installing or working on this product or from any defect in materials or workmanship (including loss or damage to property, personal injury or death), whether based on breach of contract, tort, strict or product liability, or any other legal theory.